|
This project is to raise awareness, to save to the bees! Yes, those little pest that a lot of us are afraid of, have a purpose. Pesticide's are a major factor in what is killing the bees. There are different things we can do to help the bees on an every day scale, while bigger cooperation's should do their part as well. As mothers and fathers of our future generation, we need to save these bees, and teach our children to save these bees. If something isn't done about these bees, they could be gone before our children become adults. If the bees are not saved in this generation, there wont be any left during the next generation. No more strawberries would be a very sad thing for everyone, in my opinion. It's not just the strawberries that are being affected, by loosing our bee population. Flowers, need pollen to grow, along with everything else. Bee's make an impact on what we are buying at the grocery store. This project is dedicated to fighting against CCD (Colony Collapse Disorder) "Commercial production of many specialty crops like almonds and other tree nuts, berries, fruits and vegetables depend on pollination by honey bees. These are the foods that give our diet diversity, flavor, and nutrition. "  Construction Paper BeesMaterials: Cut 4 yellow strips of Construction paper, fold every half inch, cut edges to make sure the strips are straight. Yellow strips are for arms, and legs. Cut 3 black strips per Bee, for the stripes on the body. Cut 1 yellow round oval per Bee, for the body. Have pipe cleaners for antennas, google eyes for eyes, and give your bee a smile. Directions: Give each child what they need for their bee. With glue stick or glue bottle, have the child put together their bee. (more coming soon, published before finished, oops) Here is some more information on what exactly is happening to the bees. New studies have been done to figure out why the bee population is diminishing.
0 Comments
Skills to Promote:
To promote hand eye coordination To enhance knowledge and build understanding about bugs To make connections about legs, and counting how many. To enhance recycling motivations Materials: Recycled paper towel rolls (cut 4in for the body cut 1 1/2 in for head) Unless your making a really long caterpillar. Cut sizes to your digression. Pipe cleaners (antennas and legs) Paint ( to paint the caterpillar) Paint Brushes Scissors Glue Gun Pom-Poms for nose and Google eyes Directions: 1. Take card board pieces of paper towel roll and hot glue the head to the body. Turn the head so the holes are on the side, and the holes on the body are in the front. 2. Cut six holes for legs under the body, and cut two holes on top of the head for antennas. 3. Cut pipe cleaners, into 1-2 in sections. You will need 8 evenly sized pipe cleaner pieces. Squeeze pipe cleaners through the holes, or have children do so. 4. Secure pipe cleaners with hot glue. Let Dry. 5. Set up painting area, and have children paint their caterpillars the color of their choice. Objective: When given the caterpillar, the child will paint, and they will hopefully view caterpillars as cute, instead of scary. They will paint the caterpillar, and personalize, while reusing recycled materials from home. (Picture coming soon) 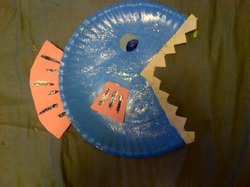 Here is a paper plate fish. I made this one to show the girls and example of how to turn an ordinary paper plate into a piece of art work. These are just the beginning of the many different animals that the girls are going to be making. These animals are so much fun to make. His teeth do look a little scary! 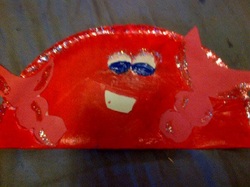 This paper plate crab isn't very crabby at all! He is a very happy crab and is very excited to share a space on the wall of incredible baby art. This was another example I had prepared for the girls. Now that they have painted their paper plates and they are dry, we are going to start making some more.
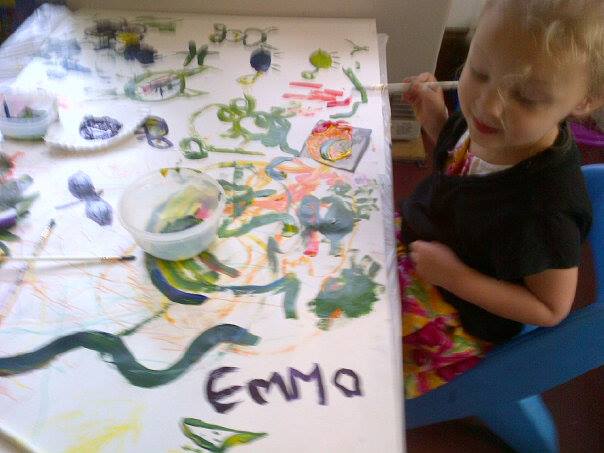
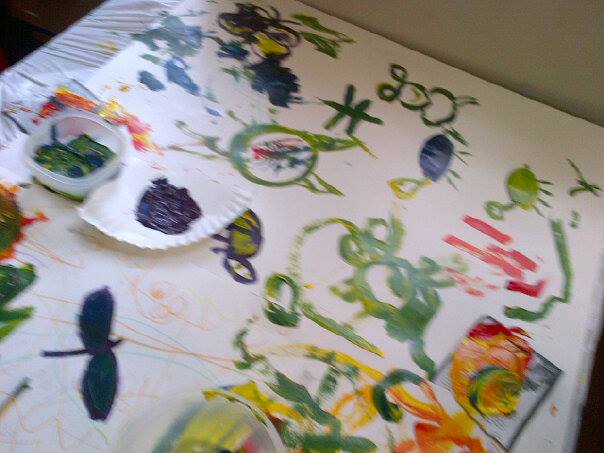
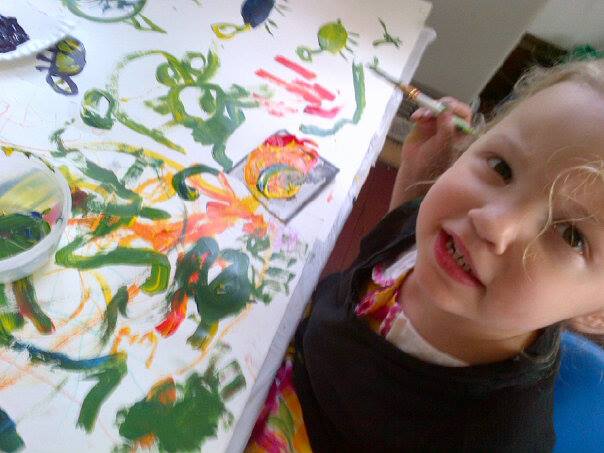
Below is a link of the project we're doing this morning. I love the way Ducky House (via Flickr) showed step by step how to do this project. If you click on the pictures, there's an even more descriptive blurb. Completely made out of construction paper, these flowers are so cute and the children will enjoy putting them together,using their favorite colors and adding their own little touches. I will be posting pictures of the end results. My phone hasn't been charging, therefore has been preventing me from posting pictures of the projects we've done this week. via: Flickr Ducky House The girls made a beautiful painting this week on two poster boards put together. I then framed the painting (after it was done drying of course) with construction paper in different colored patterns. They had a lot of fun and their Papa and Nani were able to join in on the fun! Making this painting even more special. Of course it was filled with butterflies, snakes, turtles, their names, dragonflies,jelly fish, and so much more! They enjoyed mixing the paints to make new colors.Whether they're playing in the water, using a water table, or running threw a sprinkler, water is an important part of a child's sensory development and enhances science concepts at an early age.
Some days it's not going to be an option to go to the beach. Some people may only have access to pools in the summer time if beaches are too far away. As most states are relatively far from the ocean, and don't offer many lakes for swimming or water play. (make sure there are no allergies to shell fish) If going to the beach is not an option, make your own! Most craft stores have sea shells you can buy, or if going to the ocean, collect them together. Even most grocery stores may have some different types of shells. Fill a water table or long tote with water, and put the different shells, and containers in the bucket. Sand toys work well as water toys too. Rubber ducks, water toys for the tub including turtles, and mermaids in the bucket of water. In a different area set up a sand box with beach sand you can find at Walmart, local hardware store, or pool supply store. An important sensory aspect of the beach is the dry, soft sand. Sand has a very different texture than water does. Having a sand box filled with sea shells and different sand toys to aid in explorations of textures include; shovels, scoops, spoons, bowls, buckets, sifters, and shaped castle buckets. The children can either go back and forth or choose which area they like the most. Have towels ready, swimmers and swim suits on for the water table. I suggest having a change of clothes handy and lots of towels. Make sure sand stays away from mouths, and they do not drink the water. Babies should always be supervised while near water. The tote/table is not for swimming. Always take caution with babies of any age, near any kind of water. |
We Love the BabiesThis page is for up to date lesson plans. These are new lesson plans that I have created myself, or have searched for. All credit is given where due. Lets get these little minds running! Archives
August 2014
Categories
All
|
 RSS Feed
