|
This project is to raise awareness, to save to the bees! Yes, those little pest that a lot of us are afraid of, have a purpose. Pesticide's are a major factor in what is killing the bees. There are different things we can do to help the bees on an every day scale, while bigger cooperation's should do their part as well. As mothers and fathers of our future generation, we need to save these bees, and teach our children to save these bees. If something isn't done about these bees, they could be gone before our children become adults. If the bees are not saved in this generation, there wont be any left during the next generation. No more strawberries would be a very sad thing for everyone, in my opinion. It's not just the strawberries that are being affected, by loosing our bee population. Flowers, need pollen to grow, along with everything else. Bee's make an impact on what we are buying at the grocery store. This project is dedicated to fighting against CCD (Colony Collapse Disorder) "Commercial production of many specialty crops like almonds and other tree nuts, berries, fruits and vegetables depend on pollination by honey bees. These are the foods that give our diet diversity, flavor, and nutrition. "  Construction Paper BeesMaterials: Cut 4 yellow strips of Construction paper, fold every half inch, cut edges to make sure the strips are straight. Yellow strips are for arms, and legs. Cut 3 black strips per Bee, for the stripes on the body. Cut 1 yellow round oval per Bee, for the body. Have pipe cleaners for antennas, google eyes for eyes, and give your bee a smile. Directions: Give each child what they need for their bee. With glue stick or glue bottle, have the child put together their bee. (more coming soon, published before finished, oops) Here is some more information on what exactly is happening to the bees. New studies have been done to figure out why the bee population is diminishing.
0 Comments
Skills to Promote:
To promote hand eye coordination To enhance knowledge and build understanding about bugs To make connections about legs, and counting how many. To enhance recycling motivations Materials: Recycled paper towel rolls (cut 4in for the body cut 1 1/2 in for head) Unless your making a really long caterpillar. Cut sizes to your digression. Pipe cleaners (antennas and legs) Paint ( to paint the caterpillar) Paint Brushes Scissors Glue Gun Pom-Poms for nose and Google eyes Directions: 1. Take card board pieces of paper towel roll and hot glue the head to the body. Turn the head so the holes are on the side, and the holes on the body are in the front. 2. Cut six holes for legs under the body, and cut two holes on top of the head for antennas. 3. Cut pipe cleaners, into 1-2 in sections. You will need 8 evenly sized pipe cleaner pieces. Squeeze pipe cleaners through the holes, or have children do so. 4. Secure pipe cleaners with hot glue. Let Dry. 5. Set up painting area, and have children paint their caterpillars the color of their choice. Objective: When given the caterpillar, the child will paint, and they will hopefully view caterpillars as cute, instead of scary. They will paint the caterpillar, and personalize, while reusing recycled materials from home. (Picture coming soon) 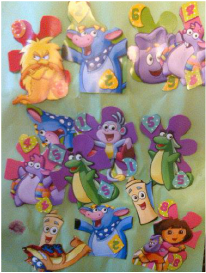 As noted before flash cards are an amazing learning tool for children of all ages. Even the most organized mother can end up having a pile of mixed matched flash cards. The other night while sorting through their flash cards, I separated the ones that had no matches, or the incomplete sets. I Just happened to have a mixed match set of Dora cards. The other card I organized and held them together with rubber bands. With the extra cards I cut out the pictures of the characters, the numbers, and anything that they could glue onto a collage of their own. Mya had a great time with this as Dora is her favorite show. She was able to take the glue, apply it to the picture and then apply it to the paper. She picked out the construction paper for the background, and was very cooperative. Also, a great idea to save in a zip lock bag, pictures from magazines the child is interested in. With summer here, these are some child friendly collage ideas.
1. Recycled Flash Cards 2. Pictures of Flowers 3. Pictures of Animals 4. Construction Paper Shapes Materials Needed: Glue (stick or liquid, depending on texture) Scissors for older children, I also suggest cutting pictures prior to collage project. Background paper (card stock, construction paper, cardboard) Skills To Promote:
To promote sensory skills. To enhance the scenes. (touch, feel, smell, sight) To enhance fine motor skills. Materials: Zip Lock Bags Hair Gel Confetti/Glitter Packet Tape Directions: 1. Take a couple scoops of hair gel/ Glitter packet and add to zip lock bag. 2. After removing excess air from bag, seal bag and clean off excess hair gel. Make sure to dry the bag, and that the hair gel is locked in. 3. Tape the top of the bag, with tape and/or construction paper strip folded over the top about an inch in diameter. Seal bag tight to avoid leaking. Objective: When given a sensory bag, the child will squish, point, and push the solution around exercising their sensory skills. Tip: We used blue hair gel, with purple flowers and plastic butterflies. The next day the solution was a different color. It turned light purple. Everyday the solution changed a little darker. It started to look less like blue, and more like purple. The next day I asked "what changed in the bag?" It was a very pretty project/experiment. 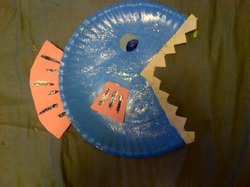 Here is a paper plate fish. I made this one to show the girls and example of how to turn an ordinary paper plate into a piece of art work. These are just the beginning of the many different animals that the girls are going to be making. These animals are so much fun to make. His teeth do look a little scary! 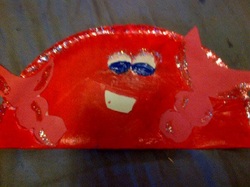 This paper plate crab isn't very crabby at all! He is a very happy crab and is very excited to share a space on the wall of incredible baby art. This was another example I had prepared for the girls. Now that they have painted their paper plates and they are dry, we are going to start making some more.
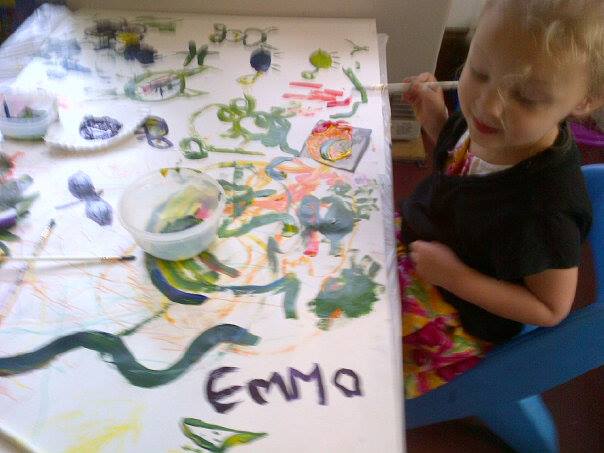
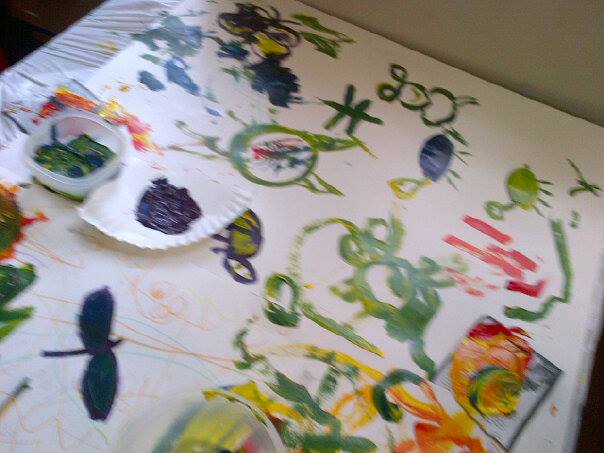
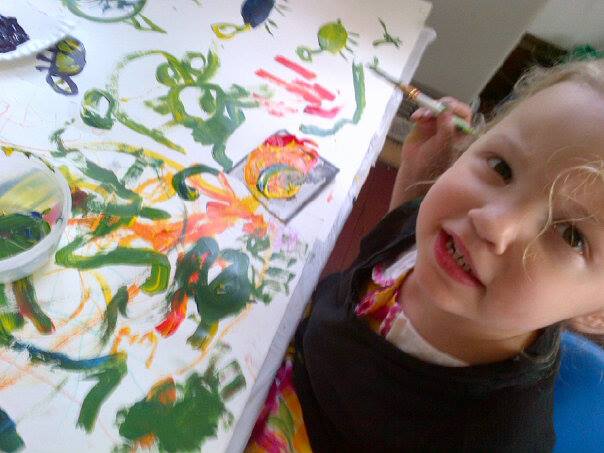
Below is a link of the project we're doing this morning. I love the way Ducky House (via Flickr) showed step by step how to do this project. If you click on the pictures, there's an even more descriptive blurb. Completely made out of construction paper, these flowers are so cute and the children will enjoy putting them together,using their favorite colors and adding their own little touches. I will be posting pictures of the end results. My phone hasn't been charging, therefore has been preventing me from posting pictures of the projects we've done this week. via: Flickr Ducky House The girls made a beautiful painting this week on two poster boards put together. I then framed the painting (after it was done drying of course) with construction paper in different colored patterns. They had a lot of fun and their Papa and Nani were able to join in on the fun! Making this painting even more special. Of course it was filled with butterflies, snakes, turtles, their names, dragonflies,jelly fish, and so much more! They enjoyed mixing the paints to make new colors.When bringing children out during the summer time, sun block is a must have. The UV levels from the sun have been high already this summer. Protecting children from over exposure to sun, keeping them hydrated, providing the proper swim wear, and using proper floating devices can make beach time much more fun and way less stressful. The sun is too strong and dangerous to a young child's or even adult's skin. Any children's sunblock should be sufficient enough. We tend the copper brand. The bottle is pink with a blue cap. There are so many varieties of sunblock and various solutions. There's sun block products that change color as applied, making it easier to see where it's been applied. There are sprays, regular lotion that goes on white. Organic children's sunblock is probably better, and I want to try it for a safer alternative. Watch carefully for skin reactions, and allergies to ingredients. Always read the ingredients of anything used on a child or even an adult. There may be some ingredients in the sunblock that can cause an allergic reaction, especially if the child has sensitive or pale skin. I suggest finding a lotion that works for the family with positive results and sticking with it. From being outside in the sun and being active in the water, keep track of the consumption of water the child is drinking. Make sure to encourage drinking fresh bottled water, and avoid dehydration. Drinking a cup every hour and encourage a lot of water drinking. Becoming dehydrated is very dangerous, and if at any time someone starts to show signs of dehydration, call for an ambulance or "911" right away.
Proper swim wear is an important part of bringing young children to the beach, lake, or any pool. If a baby is wearing a regular diaper, whether it's Huggies, Pampers. generic, or an organic diaper, they inflate and full with water when submerged in water. I never knew that before having my own babies. Even after it still surprises me how much water a diaper can hold until it falls apart. There are special diapers for babies time in the water called swimmers. The Huggies Swimmers are the only brand swimmers I've used before. I'm pretty sure Pampers are coming out with their first swimmers this year. I'm very interested in trying them out on the babies, and plan on writing a review on Pampers vs. Huggies. Instead of using a regular diaper in the water use a swimmer. Let the floats do the floating. Also, having a two piece on the girls makes changing the swimmers much easier. I am not a fan personally of most of the bathing suits they have for children and babies. It's alright to be modest here. Keep those babies covered up. The more fabric on a child swim wear the better. Changing a diaper of a swimming toddler or water enthusiastic baby is very hard to do when the baby is wearing a one piece bathing suit. Without undressing the child to get to the diaper a two piece would make more sense. After three years of changing babies at the beach, there will no longer be one pieces. They do have a lot of good suits that have tank tops and shorts. We will be looking for into those this year to prevent diaper changing disasters. It's always a good idea to plan ahead, especially with little ones. When going to the beach or lake, find out what types of floats are acceptable there. Every public swimming place will have different rules. Getting over the fact that I couldn't use my babies float at my favorite lake, made my feelings about that lake change. It is no longer my favorite lake. When I asked the life guard why they wouldn't let us use them, I was shocked when I heard their reasoning behind the rules. A mother had a baby and a float and the baby floated away, while the mother wasn't paying attention. It is so important to be on constant watch and within arms reach of the baby when they are in the water. These first experiences around bodies of water will shape any kind of feeling the child might have about swimming, and can still effect a person into adulthood. Some life jackets that are coast guard approved can be worn in some beaches, while others allow anything as long as the floatation device is used appropriately. Summer time is the perfect time to teach children about density and to experiment with objects that either;
1. float 2. sink Getting a big bowl of water or doing so in a small pool or bath tub would work as well. Different toys that the child likes, different objects that can be found outside, sticks, rocks, leaves, etc. Before putting the object in the water, make a hypothesis (educated guess) on if the object will float or sink. Make a chart. Charts are an awesome way to document progress and conclusions. Draw a picture of the object, or take a picture and put it on the chart. To document whether the object floated or sunk, draw an arrow pointing up or an arrow pointing down. This shows whether or not the object floated and will help the child make comparisons and observations. Ask lots of "open ended" questions. These kinds of questions do not require a yes or no answer. The child can be as explanatory as they please or as much as they are encouraged. Note: This would be fun with toy boats! Use words like: Float, Sink, Up, Down, Heavy, Light, Hard, Soft, Big, Small, and Medium. |
We Love the BabiesThis page is for up to date lesson plans. These are new lesson plans that I have created myself, or have searched for. All credit is given where due. Lets get these little minds running! Archives
August 2014
Categories
All
|
 RSS Feed
